Signing
Your organisation's signing certificate, timestamp server and organisation certificate. Every signature made with Sign PDF is a digital signature from a certificate SuaveDocs issues for your organisation, unless the person chose their own certificate; PDF readers show it as verified once they trust your organisation's root certificate.
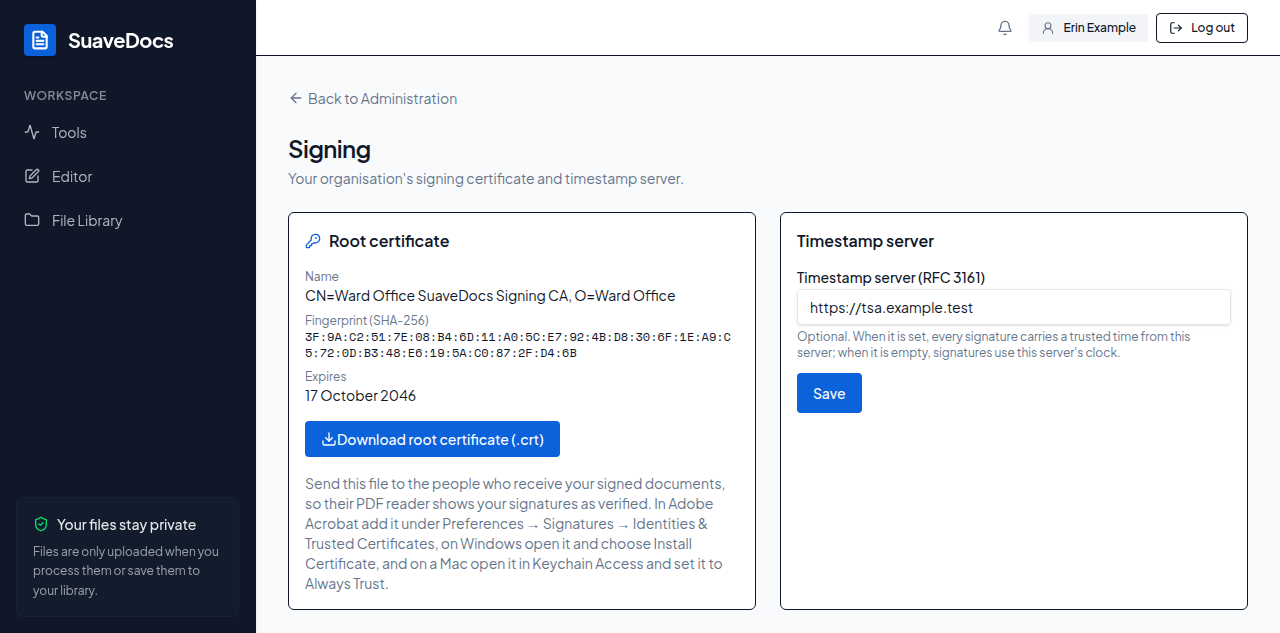 Figure: the Signing page.
If signing isn't set up: the page says why — for example "Signing isn't set up on this server yet: INTEGRATIONS_ENC_KEY is missing." (or just "Signing isn't set up on this server yet." when the server gives no reason) — and "Until it is, nobody in the workspace can sign documents." Whoever runs your SuaveDocs server sets it up.
To hand out the root certificate:
- Open Signing from Administration.
- If it says "There's no signing certificate yet. SuaveDocs makes one the first time someone signs, or you can make it now.", select Create certificate — "Certificate created. You can download it now."
- Check the Name, the Fingerprint (SHA-256) and the Expires date.
- Select Download root certificate (.crt).
- Do what the page says under it: "Send this file to the people who receive your signed documents, so their PDF reader shows your signatures as verified. In Adobe Acrobat add it under Preferences → Signatures → Identities & Trusted Certificates, on Windows open it and choose Install Certificate, and on a Mac open it in Keychain Access and set it to Always Trust."
To use a timestamp server:
- Type its address into Timestamp server (RFC 3161) — it must start with https://. Leave it empty to use the server's own clock.
- Select Save.
What you'll see when it's done: "Saved. New signatures get their time from this timestamp server." — or, after emptying the box, "Saved. New signatures use this server's clock."
- "The timestamp server address must start with https://"
- "The signing settings couldn't be loaded." followed by the reason, or "Try again in a moment."
- When the timestamp server doesn't answer, people signing see "The timestamp server didn't answer. Try again, or ask an administrator to check Administration → Signing." — check the address here, or empty the box.
The organisation certificate
A certificate your organisation got from a certificate authority, uploaded once. "Signs the final record of every signature request, and lets administrators sign for the organisation. Without one, SuaveDocs' certificate for your workspace is used." Administrators then see Organisation certificate under More options → Certificate in Sign PDF and on the signing page. Adding, replacing and removing it is for owners and administrators of a workspace that can be changed; anyone else who can open this page sees the certificate but no buttons, and the line "Only owners and administrators can change it, in a workspace that isn't read-only."
To add it:
- Under Organisation certificate, select the Certificate file (.p12 or .pfx) — "A .p12 or .pfx file up to 64 KB."
- Type its Password — "The password that opens the file. SuaveDocs uses it once to read the certificate and never keeps it." — and, if you like, a Name (optional).
- Select Add certificate.
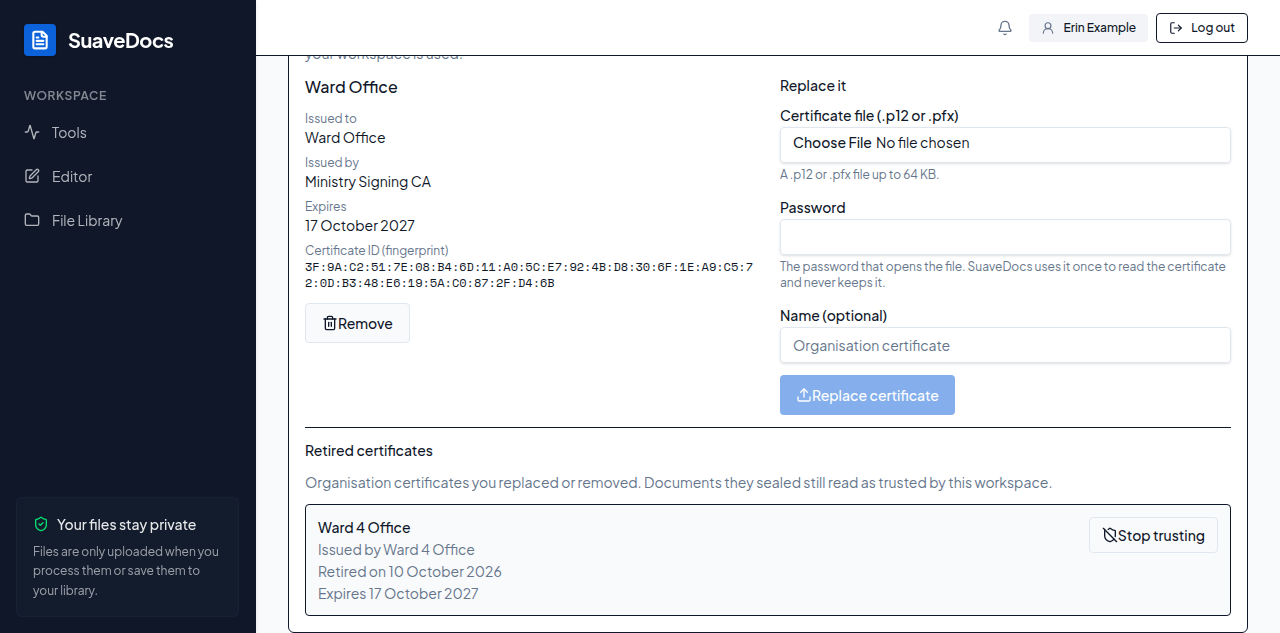 Figure: the organisation certificate on the Signing page, and under it the Retired certificates list, one certificate with its Stop trusting button.
What you'll see when it's done: "Organisation certificate added." and the certificate's name, Issued to, Issued by, Expires and Certificate ID (fingerprint). To change it, use Replace it → Replace certificate the same way — "Organisation certificate replaced." To take it away, select Remove and confirm — "Remove the organisation certificate?" / "Documents already signed with it stay valid. From now on, completion certificates are sealed with SuaveDocs' certificate for your workspace." — "Organisation certificate removed."
Retired certificates: a certificate you replace or remove stays trusted for the documents it sealed, so they still read as trusted. Under Retired certificates ("Organisation certificates you replaced or removed. Documents they sealed still read as trusted by this workspace.") each one shows the name it carries, "Issued by <issuer>", "Retired on <date>" and "Expires <date>" (or "Expired on <date>"). If one should no longer be trusted — its password or file got out, say — select Stop trusting and confirm — "Stop trusting this certificate?" / "Documents sealed with it will no longer read as trusted by this workspace." / Keep it or Stop trusting — "That certificate is no longer trusted." If someone else already did, SuaveDocs says "That certificate is no longer listed." and shows the list as it is now. Only owners and administrators of a workspace that can be changed see Stop trusting.
- "Use a .p12 or .pfx file up to 64 KB."
- "That password doesn't open the certificate file. Check it and try again."
- "This certificate can't sign documents. Ask whoever issued it for a signing certificate."
- "This certificate expired on
<date>. Upload a current one." — and under the certificate, Expires reads "Expired on<date>" once it has expired; completion certificates are then sealed with SuaveDocs' certificate until you upload a current one. - "Only administrators can sign for the organisation." — for someone who isn't an owner or administrator.
- "This workspace is read-only right now, so changes can't be saved." — the workspace is read-only: nothing can be added, replaced, removed or stopped trusting until it can be changed again.
- "Too many uploads. Try again in
<n>minutes." — wait, then add it again. - "The certificate couldn't be added. Try again in a moment."