Resize image
Changes an image's dimensions.
To resize an image:
- Open Resize image and add your picture. You land on the Image tab of the image workspace.
- Select Resize in the toolbar. A panel appears with Width and Height boxes (in px), a Keep proportions lock, and 25%/50%/75%/100% preset buttons — the panel also shows the picture's original size.
- Type a new width or height (with Keep proportions on, the other side follows automatically), pick a preset percentage, or drag a corner handle on the picture itself.
- Once you're happy, open the Output tab to choose the file format (PNG, JPG or WebP) and quality, then select Download image (Save image on desktop).
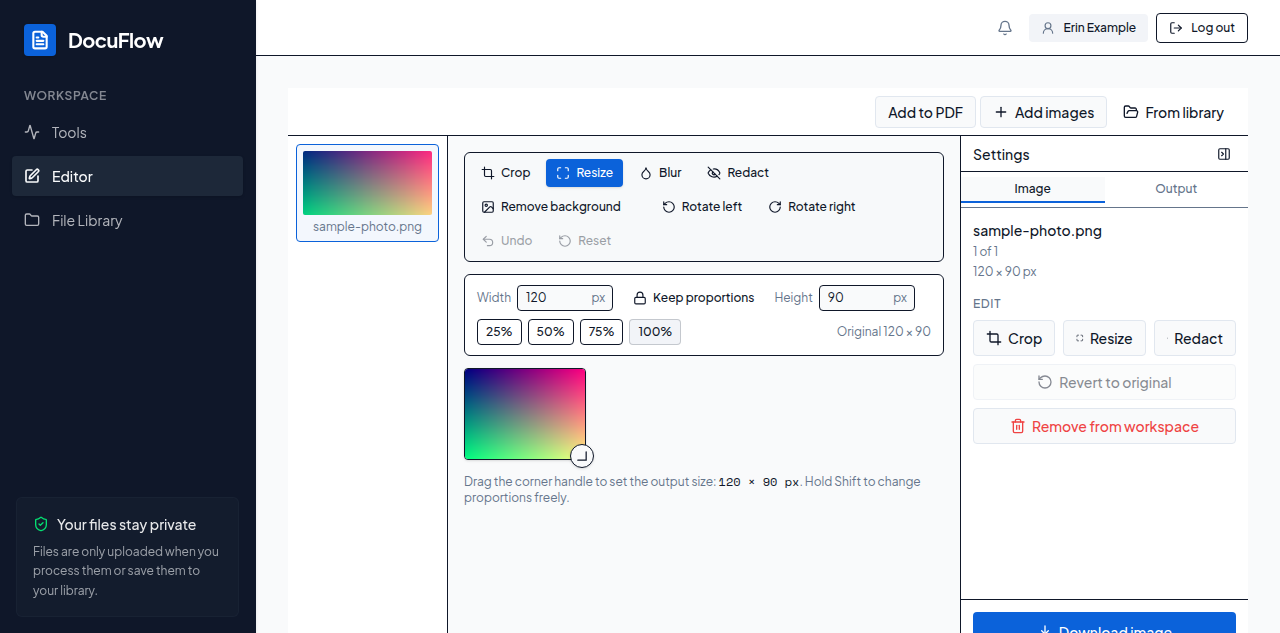 Figure: the Resize panel, with the picture's original size shown above it.
As you adjust the width, height or a preset, the picture on screen resizes immediately — nothing is sent anywhere. Resizing again always starts from the original picture (or from your last crop, blur or other non-resize edit), never from a previous resize's result, so resizing down and back up repeatedly doesn't compound quality loss. Width and height are each limited to 8,000 pixels, and the total size to 40 megapixels; going over either shows "Width and height can be at most 8,000 pixels." or "That size is too large. Keep it under 40 megapixels, for example 8000 × 5000."
What you'll see when it's done: the resized picture, with Download image (or Download all (<n>) for more than one image). On desktop this reads Save image / Save all (<n>).
Typing something that isn't a whole number of pixels shows "Enter the width and height as numbers of pixels."; a size outside the limits shows one of the two size sentences above.